Showing posts with label preserving foods. Show all posts

Sunday, June 13, 2021

Garden peas a Gardner's candy...


Every year on President's Day my Husband heads out to the garden and plants his row of peas. Regardless if there is snow on the ground he will shovel his way through and plant them. 
I love garden peas, peas are a good source of vitamins C and E, zinc, and other antioxidants that strengthen your immune system. Other nutrients, such as vitamins A and B and colostrum, they help to reduce inflammation and lower your risk of chronic conditions, including diabetes, heart disease, and arthritis. I like just eating the plain pea like candy handfuls at a time!!!
How can you preserve garden peas? 
Well with the amount My Gardener Guy grows I end up freezing some...
I could go into a long detail of how but hey I'm a busy girl and as a Realtor, Wife and Grandma there is only so much time. So I am directing you to a link of how to...
What can you do with peas, the list is long...
Use them as a side dish, purée them into a soup, add them to a stew, or briefly blanch them and toss them in risottos or pastas. When they're small and tender, they're also great raw in salads. Or, my favorite in the palm of my hand I eat them like chips or candy...

Thursday, August 28, 2014

Dill Pickles....love them

Once again I am buried  in cucumbers... I love these pickles and this year I grew my own dill heads so I'm excited to use them.
The “head” of dill is the entire seed head of a dill plant it looks like  flower kind of...the sprig is the fern looking part of the plant that grows on the stem. This plant is fun to grow and I love using a sprig of dill to garnish a dish...like deviled eggs, appetizers, and soups. For ideas type in your google search bar garnishing with dill sprigs and have fun!!! 


Ingredients:

8 pounds of pickling cucumbers
4 cups white vinegar
11 cups water
2/3 cup of pickling salt
16 cloves of garlic peeled
8 sprigs of fresh dill weed
8 tsp of dill weed and seed
8 dill heads (optional)
peppercorns
mustard seed
1/2 cup sugar (optional)
pickling spices

Directions:

1. Wash cucumbers and place in the sink with cold water and lots of ice cubes. Soak in ice for at least 2 hours but not more than 8 hours. Refresh ice as required. Sterilize 8 (1 quart ) canning jars and lids in boiling water for about 10 minutes.

2. In a large pot over medium high heat, combine the vinegar, water, and pickling salt. Bring the brine to a rapid boil.

3. Tie Pickling spices in a net and add to the large pot.

4. In each jar, place 2 half-cloves of garlic, one head of dill, one sprig of dill, 1 tsp of dill seed and weed, sprinkles of peppercorns and mustard seeds, then enough cucumbers to fill the jar (about a pound). Then add 2 more garlic halves, fill jars with hot brine. Seal jars, making sure you cleaned the jars rims of any residue.

5. Process sealed jars in a boiling water bath. Process jars for 15 minutes.

6. Store pickles for a minimum of 8 weeks before eating. Refrigerate after opening. Pickles will keep up to 2 years if stored in a cool place.

Wednesday, August 27, 2014

Tomato Jam.....great for appetizers and fantastic on a BLT!!!

My Gardner Guy's Tomato Jam.... 

Crostini with Ricotta and tomato jam or use goat cheese....it is great!!!
 

Use this as a great appetizer to top cheese and crackers, on a bagel. If your like My Gardnerguy right off the spoon is the best!!!

This Tomato Jam has become my secret ingredient in My Gardner Guy"s BLT sandwich I just mix it up with my mayonnaise and It gives the wonderful BLT a gourmet taste....also try the next link for a great dressing...
Wonderful dressing for a BLT Salad....link coming....http://mygardnerguy.blogspot.com/2011/10/simple-twist-on-blt.html

Tomato Jam

6-8 cups small tomatoes (1-2" in diameter skins on seeds in)
2 cups sugar
1 T grated ginger
zest and juice of 2 limes
zest and juice of 1 lemon
6-8 TBS of a strong vinegar
1-2 tsp. red chili flakes....use what looks good to you, optional

Combine all ingredients in a large, non-reactive pot. Bring to a boil and then reduce to a simmer. Simmer until it looks jammy; expect this to take an hour/ hour and a half and maybe even longer. When jam is ready, remove from heat and fill jars, leaving 1/3 inch of head space. Wipe rims, apply lids and twist on rings. Process in a boiling water canner for 20 minutes. Remove jars from water bath and allow them to cool. When jars are cool enough to handle, test seals. Store jars in a cool, smile....add it to your pantry collection of good food!!!
On a bagel over cream cheese....breakfast

This makes a wonderful gift...they will come back for more!!!
A dipping sauce...My Gardner Guy's way...

Plenty to put in my pantry....pretty, pretty, pretty..


Tuesday, July 15, 2014

Time for the Banana peppers!!!

Today I decided to tackle the banana peppers...I like them on sandwiches especially sub sandwiches! This is a fast and easy canning recipe to make your own Banana Pepper
sandwich rings.
Just finished in time to get ready for a date!!!

Banana Pepper Rings
Here is a link that educates you; or anyone interest in methods in preserving peppers http://anrcatalog.ucdavis.edu/pdf/8004.pdf

Ingredients

20 - 25 banana peppers
2 cups white vinegar
2 cups water
1/2 cup sugar
1/2 tsp ground turmeric
1 clove of garlic (per pint jar)
1 tsp canning/pickling salt (per pint jar)
1 tsp vegetable oil (per pint jar)
6-7  1/2 pint jars and lids, sterilized and prepared for canning

Instructions:


Wash the peppers. Slice, remove seeds, discard stem ends.
I have found that keeping the peppers in ice water helps them to stay crisp


 In each jar of packed peppers, add 1 tsp canning/pickling salt and 1 tsp vegetable oil.
add one clove of garlic and I like to add a small hot pepper to each pint jar...the pepper is optional
In a sauce pan, combine the vinegar, water, sugar, and ground turmeric. Bring to a boil.
Ladle hot pickling liquid into jars, leaving 1/2 inch head-space. Remove any air bubbles and add more liquid as needed.

Apply lids and bands, screw down to fingertip tight. Process in hot water bath for 10 minutes. Cool and store. Check back after 24 hours to make sure the lids have sealed.

Tuesday, October 8, 2013

Yellow tomato basil jam....my favorite this fall season....

Yellow tomato's make for a most golden delicious jam...I love this jam!!!


This year we enjoyed a few varieties of yellow tomato's in the garden. I have a stack of recipes, along with  quite a few book marked on my computer I want to try. So when the yellow tomato's came ripe I was excited to try this recipe. Trust me, I try a lot of recipes and if they make it to my blog that means I loved them and it will be added to my pantry to be enjoyed in my home...

Ingredients
  • 4 pounds Sun gold or other yellow tomatoes
  • 3 cups granulated sugar
  • 1/2 cup lemon juice
  • zest of two lemons, divided
  • 1/4 cup roughly chopped basil
Instructions
  1. Cut Sun gold tomatoes in half, or, if using larger yellow tomatoes, chop them into smallish pieces.
  2. Combine chopped tomatoes with sugar in a large, non-reactive pot and stir. Let sit for at least one hour, or until the tomatoes release their juice.
  3. When ready to cook, prep canning pot and jars and place jam pot over high heat. Add lemon juice and bring to a boil.
  4. Cook at a boil for 30-35, stirring frequently, until the tomatoes have softened and the syrup has gotten thick. Once you’re satisfied with the set, remove the pot from the heat and stir in half the lemon zest and chopped basil. Taste and add remaining lemon zest only if you feel the jam requires it.
  5. Pour jam into prepared jars. Wipe rims, apply lids and rings. Process jars in a boiling water bath canner for 10 minutes.
 

Wednesday, August 7, 2013

Red Salsa

Over the past few years I have been testing different salsa recipes and when it came to the red salsa I had not found what I liked or loved until now....the difference I have found is I like using the lime juice instead of the vinegar that most canning recipes call for. So here it is I love it!!!!

Red Salsa with lime
  • 10 quarts of plum tomatoes or in my case any tomatoes I am growing (I prefer seeding them) 
  • Pickling salt
  • 6 large onions
  • 6-8 heads garlic
  • 1 lb jalapeno pepper
  • 6 large mild bell peppers
  • 2 1/2 cups minced cilantro
  • 1 (5 1/2 ounce) can tomato paste
  • 2 tablespoons lime juice (per 500 ml jar or pint jar)
Directions

  1. Deseed and dice your tomatoes (see http://www.youtube.com/watch?v=qI0d2qliO7) this will show you what deseeding a tomato is). 

  2. Dicing the tomatoes fine or deseeding or not does not matter...you can  chop them coarsely but which ever way you choose sprinkle with pickling salt in layers as you go - I try to use about 5 tablespoons.

  3. Put them in a strainer and set in a cool place (but NOT the fridge!) to drain for several hours.

  4. Prepare your canning jars, lids, sterilize.

  5. Peel and chop onions (I like then fine)

  6. Peel and deseed the peppers, and chop them (again I like them finely chopped).

  7. Peel and mince the garlic and mince cilantro

  8. Mix all the ingredients except the lime juice in a large pot, make sure tomato paste is mixed in well and lump-free.

  9. Bring the salsa to a boil.

  10. Pack salsa into warm sterilized jars

  11. Add 2 tbsp lime juice to each jar

  12. Apply  heated lids and bands, screw down to fingertip tight.

  13. Return the bottles to the boiling water bath and process them for 20 minutes.

  14. Remove, allow to cool, and check seals

Saturday, October 20, 2012

Lots of Orange....

We have lots of pumpkins to cook up in a few weeks but today carrots are on the to do list...


Freezing this pretty orange vegetable....it's easy!!!
According to The Ball Blue Book of Preserving}
1. Pick a large quantity of young, tender carrots and cut the tops off.
  • I set all of the carrots in a sink full of cold water. A lot of the dirt will fall to the bottom if you let them sit for an hour or so.  At times I have let them set overnight.
2. Wash, peel, and then wash again!
3. Dice, slice or quarter medium sized carrots. For larger carrots, just dice into matching sized pieces.
Small carrots can be frozen whole.
  • I dice some and add them to my peas for dinner meals. Or I slice some for just carrots served as a side vegetable. After blanching whole carrots I shred some for carrot cake, muffins, or anything you would need shredded carrots for. I then put 2 cups in each freezer bag.
4. Blanch cut carrots for 3 minutes, whole carrots for 5 minutes.
5. Cool and drain on a clean dish towel on your counter top.
6. Package into freezer bags, label, and freeze.
  • They are good for up to a year....
Thanks,
Georgie

Saturday, August 18, 2012

Jalapeno's sweet with some heat....


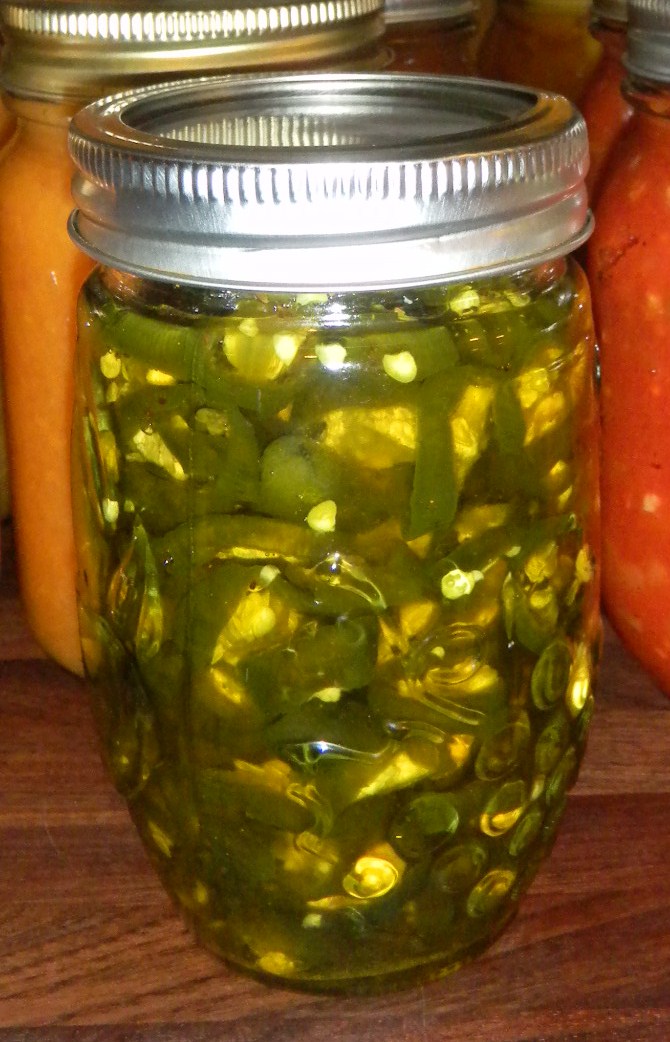
This time of the year I am swamp with trying to keep up with My Gardner Guy...tomorrow I am heading south so today I needed to get some canning done. Jalapeno's for My Gardner Guy were on the list.

Ingredients:

1 1/2 pounds of jalapenos
1 cup of  cider vinegar
3 cups of sugar
1/4 tsp tumeric
1/4 tsp celery seed
3/4 tsp garlic powder
1/4 tsp cayenne pepper (optional)

Directions:

Slice Jalapenos. Mix cider vinegar, sugar, tumeric, celery seed, garlic, and cayenne. Bring this to a boil reduce and allow to simmer for 5 minutes. Add sliced jalapeno's and allow to simmer another 5 minutes. Load sterilized jars with jalapenos first and then add liquid filling the jars leaving 1/4 headspace. Process in a water bath for 15 minutes.

Thursday, August 16, 2012

Peaches.....


 Canning Peach Pieces

   
As much as I love canning, I get a little  bored with doing the same old things. Faced with quite a few peaches, pears and grapes I sometimes have to make the most of my time. So I bottle a few sliced up, but then I turn the rest into pear sauce, just like doing apple sauce. I make pear sauce, apricot sauce, peach sauce and apple sauce. All the flavors work for mixing in my yogarts or for making sorbet...For now I will share my method of the sliced peaches but watch for more infomation on fruit sauces!!!


There are many methods to can peach pieces, including cold and hot pack, with syrup, juice, or water. Below is a metod I like doing....

1) Blanche peaches in boiling water and shock in ice water to loosen skins.
2) Remove skins.
3) Slice peach in half, remove pit ( a freestone variety is easier to pit ), and slice each half into six slices.
4) Place the slices in a large pot. Any pieces that do not hold together for nicely formed slices go in a smaller pot for making into peach jam.
5) Make a very light syrup of 1 cup sugar to 8 cups water by gently heating to dissolve the sugar into the water.
6) Pour syrup over peaches and heat to a gentle boil. Hold at boiling for 5 minutes.
7) Ladle peach pieces into sterilized pint jars. Use a knife to gently stir and release air bubbles. Pour syrup over top, leaving 1/2 inch headspace.
8 ) Secure sterilized two piece lids on jars and place in a boiling water bath. Process for 20 minutes.
9) Admire the jars.
10) The following day, remove the rings. Wipe the residual sticky-ness from the jars with a warm wet cloth and label each lid with the product and date. Store in a cool, dark place until use.

Saturday, August 11, 2012

You know how my Gardner Guy loves Hamburgers, he loves good Hot Dogs also....when we got married I made him some relish, we had taken a day trip to Brigham City to eat at Maddox's steakhouse and to visit their produce stands. This is where I loaded up on the ingredients to make a batch of relish I knew he would love. Since then he took to the garden and continues to bring me more things to cook!!!

Zucchini Relish
12 cups grated zucchini (sometimes  I have added yellow crook neck squash)
4 cups grated or chopped onion
3 red peppers finely diced/chopped
3 green pepper diced/chopped (can use a mixture of colored peppers)
1 bag of Soybeans or Lima beans (frozen kind)
5 Tablespoons of kloser salt/pickling salt
Mix and add enough water to cover all ingredients & let sit in fridge for at least 3 hours or overnight
Rinse and drain well

Make the Syrup
2 1/4 cups vinegar
1 tsp. dried mustard
1 tsp. nutmeg
1 tsp. turmeric
2 TBS cornstarch (mix in blender with vinegar)
1/2 tsp. cayenne pepper
2 TBS celery seed
6 cups sugar
Combine syrup mixture with your zucchini mixture and cook for 30 minutes on a medium high heat...fill sterilized jars and seal. I like to then place them in a hot water bath for 20 minutes.
For my family and friends I made 60 1/2 pints for Christmas 2011 gifts...
It is that good and worth sharing!!!

I like to add color

A lima bean or soybean looks pretty in this relish

This is a huge recipe so use a very large pot

Almost done...

My oh my how pretty!!!

Friday, August 10, 2012

I love Garlic, and My Gardner Guy grows a lot of it. I have dried it, minced it and packed it in oil for quick use, made my own garlic power for baking, pickled it for delicious snacking, and I cook with it almost daily....Did I say I Love My Garlic!!!! See notes below for storing garlic, drying and making your own garlic powder.

My many ways of using the garlic My Gardner Guy grows!!!
I needed another picture as I forgot the pickled garlic....it's my favorite!!!
Lots of the garlic Rose!!!


Pickled Garlic is one of my favorites!!!


For a great pickling recipe see the following link...I promise when you taste these you'll soon be adding more garlic to your Kitchen!!!

My Gardner Guy...Grow, Create, Cook and Eat...: Garlic...Garlic...and more Garlic and one more day until kitchen demolition!!!

Growing garlic in your garden? Drying it for long-term storage is a snap.

  1. Place the entire garlic plant (bulb, roots and stalk) in a cool, dry place. You can tie the garlic in bunches and hang it, or spread your harvest out on a rack. Either way, good ventilation is a must.
  2. Allow the garlic to dry for a few weeks (elephant garlic needs at least four weeks to cure). The outer wrapper will papery and shrunken when the garlic is dry.
  3. Once dry, trim the roots close to the bulb (leave about a half-inch remaining).
  4. Use a soft brush to remove any dirt from the bulb. The outer layer of the wrapper can be removed, if further cleaning is desired – but try not to remove much more than that.
  5. Leave the stalks intact, if you plan to braid your garlic. Trim them to within an inch or two of the bulb if you plan to store your garlic loose.
  6. Your garlic is now ready for storage! Keep it in a cool, dry place and it should stay fresh for months.

Tips:

  1. Save some of your biggest bulbs for planting next year
  2. Only undamaged bulbs should be dried for storage. If you nick a bulb while digging it up, you'll need to use it right away
  3. Use some of your garlic to make your own garlic powder (See below)

What You Need

  • Freshly dug garlic
  • A soft brush for scrubbing
  • Scissors


Homemade garlic powder is fresh, flavorful and surprisingly easy to make. Here's how to do it:

Ingredients:

  • Garlic Cloves

Preparation:

1. Peel your garlic cloves, and slice them thin.
2. Then, place the garlic slices in a 150 degree oven or in a dehydrator, and heat until dry.
Tip: The garlic is dry when you can crush it in your hand and it crumbles easily.
3. Allow the garlic to cool. Then, grind with a coffee grinder, spice mill, food processor or mortar and pestle until you reach your desired consistency.
4. Store your finished garlic powder in an air-tight container in a cool, dry spot or freeze.

Wednesday, June 27, 2012

Peas.....A Garden Treat!!!

Peas

The Pea is a frost-hardy, cool-season vegetable that can be grown throughout most of the United States, wherever a cool season of sufficient duration exists. For gardening purposes, peas may be classified as garden peas (English peas), snap peas and snow peas (sugar peas). Garden pea varieties have smooth or wrinkled seeds. The smooth-seeded varieties tend to have more starch than the wrinkled-seeded varieties. The wrinkled-seeded varieties are generally sweeter and usually preferred for home use. The smooth-seeded types are used more often to produce ripe seeds that are used like dry beans and to make split-pea soup. Snap peas have been developed from garden peas to have low-fiber pods that can be snapped and eaten along with the immature peas inside. Snow peas are meant to be harvested as flat, tender pods before the peas inside develop at all. The Southern pea (cowpea) is an entirely different warm-season vegetable that is planted and grown in the same manner as beans.

Recommended Varieties

The following varieties (listed in order of maturity) have wrinkled seeds and are resistant to fusarium wilt unless otherwise indicated.
Early
Daybreak (54 days to harvest; 20 to 24 inches tall, good for freezing)
Spring (57 days; 22 inches tall; dark green freezer peas)
Main Season
Sparkle (60 days to harvest; 18 inches tall; good for freezing)
Little Marvel (63 days; 18 inches tall; holds on the vine well)
Green Arrow (68 days; 28 inches tall; pods in pairs; resistant to fusarium and powdery mildew)
Wando (70 days; 24-30 inches; withstands some heat; best variety for late spring planting)
Sugar
Snowbird (58 days; 18 inches tall; double or triple pods in clusters)
Dwarf Gray Sugar (65 days; 24 to 30 inches)
Snowflake (72 days; 22 inches to harvest; high yield)

When to Plant

Peas thrive in cool, moist weather and produce best in cool, moderate climates. Early plantings normally produce larger yields than later plantings. Peas may be planted whenever the soil temperature is at least 45°F, and the soil is dry enough to till without its sticking to garden tools.
Plantings of heat-tolerant varieties can be made in midsummer to late summer, to mature during cool fall days. Allow more days to the first killing frost than the listed number of days to maturity because cool fall days do not speed development of the crop as do the long, bright days of late spring.

Spacing & Depth

Plant peas 1 to 1-1/2 inches deep and one inch apart in single or double rows. Allow 18 to 24 inches between single or pairs of rows. Allow 8 to 10 inches between double rows in pairs.

Care

The germinating seeds and small seedlings are easily injured by direct contact with fertilizer or improper cultivation. Cultivate and hoe shallowly during the early stages of growth. Most dwarf and intermediate varieties are self-supporting. The taller varieties (Green Arrow and Bolero) are most productive and more easily picked when trained to poles or to a fence for support; but they are no longer popular. Peas can be mulched to cool the soil, reduce moisture loss and keep down soil rots. Some of the snap and sugar peas are vining types with heights of 6 feet or more that require fencing or other supports.

Harvesting

Garden Peas
When the pea pods are swollen (appear round) they are ready to be picked. Pick a few pods every day or two near harvest time to determine when the peas are at the proper stage for eating. Peas are of the best quality when they are fully expanded but immature, before they become hard and starchy. Peas should be picked immediately before cooking because their quality, especially sweetness (like that of sweet corn), deteriorates rapidly. The pods on the lower portion of the plant mature earliest. The last harvest (usually the third) is made about one week after the first. Pulling the entire plant for the last harvest makes picking easier.
Sugar Snap Peas
Snap peas should be harvested every 1 or 3 days, similarly to snow peas to get peak quality. Sugar snaps are at their best when the pods first start to fatten but before the seeds grow very large. At this point, the pods snap like green beans and the whole pod can be eaten. Some varieties have strings along the seams of the pod that must be removed before cooking. Sugar snaps left on the vine too long begin to develop tough fiber in the pod walls. These must then be shelled and used as other garden peas, with the fibrous pods discarded. Vining types of both sugar snap and snow peas continue to grow taller and produce peas as long as the plant stays in good health and the weather stays cool.
Snow Peas
These varieties are generally harvested before the individual peas have grown to the size of BBS, when the pods have reached their full length but are still quite flat. This stage is usually reached 5 to 7 days after flowering. Snow peas must be picked regularly (at least every other day) to assure sweet, fiber-free pods. Pods can be stir-fried, steamed or mixed with oriental vegetables or meat dishes. As soon as overgrown pods missed in earlier pickings are discovered, remove them from the plants to keep the plants blooming and producing longer. Enlarging peas inside these pods may be shelled and used as garden peas. Fat snow pea pods (minus the pea enlarging inside) should be discarded. Fibers that develop along the edges of larger pods, along with the stem and blossom ends, are removed during preparation. Pea pods lose their crispness if overcooked. The pods have a high sugar content and brown or burn quickly. Do not stir-fry over heat that is too intense.
Pea pods can be stored in a plastic bag in the refrigerator for two weeks. Unlike fresh green peas, pea pods deteriorate only slightly in quality when stored.

Common Problems

The first signs of fusarium wilt and root-rot disease are the yellowing and wilting of the lower leaves and stunting of the plants. Infection of older plants usually results in the plants producing only a few poorly filled pods. These diseases are not as prevalent on well-drained soils. Double-dug raised beds amended with abundant organic matter can greatly improve soil aeration and drainage. Fusarium wilt can be avoided by growing wilt-resistant varieties.

Questions & Answers

Q. Should I inoculate my peas with nitrogen-fixing bacteria before planting?
A. When peas are planted on new land, you may increase the yield by inoculating peas with a commercial formulation of nitrogen-fixing bacteria. In an established garden, however, inoculation is less necessary. If you are in doubt, inoculation is a relatively inexpensive process that is easy to do and ensures better plant-nutrient status.

Selection & Storage

There are two common varieties of peas, green garden peas that need shelling and edible-pod peas that are eaten whole. Snow peas, sugar snap peas Chinese pea pods and many others fall into this category. They are low fiber pods with small wrinkled peas inside. The entire pod is eaten, cooked or raw.
Green garden peas are legumes just like dried peas, except they are eaten at the immature stage.
They are a cool weather, early spring crop. Harvest edible-pod peas when they are flat. Use both hands. Holding the plant stem in one hand use the other hand to pull off the pod. Using one hand, you can easily pull up the entire plant.
The smaller pods are sweeter and more tender. Use them for eating raw and cook the larger ones. The shelled peas should be plump but not large. Check one until you become familiar with the appearance. The plumpest peas should be gathered before the pod starts to wrinkle on the stem. Old peas taste starchy and mealy.
Fresh peas keep for 2 to 3 days in the refrigerator. The sugar in them quickly begins to turn to starch even while under refrigeration. As much as 40 percent of the sugar is converted in a few hours. Store unwashed peas in perforated plastic bags for a few days. The sooner they are eaten the better.

Nutritional Value & Health Benefits

Green garden peas are a valuable source of protein, iron and insoluble fiber. Insoluble fiber helps to reduce serum cholesterol thus reducing the risk of heart disease and stroke. Sugar snap peas and the like, contain much less protein, but they are an excellent source of iron and vitamin C that work to keep your immune system functioning properly.
Nutrition Facts (1/2 cup cooked garden peas)
Calories 67
Dietary Fiber 2.4 grams
Protein 4.3 grams
Carbohydrates 12.5 grams
Vitamin A 478 IU
Vitamin C 11.4 mg
Folic acid 50.7 micrograms
Iron 1.2 mg
Potassium 217 mg
Magnesium 31 mg
Nutrition Facts (1/2 cup cooked snow peas)
Calories 34
Dietary Fiber 1.4 grams
Protein 2.6 grams
Carbohydrates 5.6 grams
Vitamin C 38.3 mg
Iron 1.6 mg
Potassium 192 mg
Magnesium 21 mg

Preparation & Serving

Wash garden peas just before shelling. To shell, pinch off the ends and pull the string down on the inside of the pod and pop the peas out. Wash edible pod peas and trim both ends. Remove the string from both sides of the pod. Cook briefly or serve raw. Steam, sauté or stir-fry quickly to retain the bright green color and vitamin C content. Vitamin C is easily destroyed by over cooking.

Home Preservation

Peas freeze beautifully if they are fresh. Fresh frozen peas do not need to be cooked upon thawing. Just add to soups, stews or heat briefly before serving.
To Prepare Garden Peas or Sugar Peas for Freezing
Since freezing does not improve the quality of any vegetable, it is important to start with fresh green pods. Avoid old tough pods as they will only get tougher during freezing.
  1. In a blanching pot or large pot with tight fitting lid, bring about 5 quarts of water to a rolling boil.
  2. Meanwhile, wash, trim and string, pea pods.
  3. Blanch no more than one pound of peas at a time. Drop peas into boiling water and immediately cover with a tight fitting lid.
  4. Start timing the blanching immediately and blanch shelled peas for two minutes and pods for five minutes.
  5. Prepare an ice water bath in a large 5 to 6 quart container or use the sink.
  6. Remove the peas from the blanching water with a slotted spoon or blanching basket.
  7. Emerge the peas in the ice water bath for 5 min. or until completely cool. If ice is unavailable, use several changes of cold tap water to cool the vegetables.
  8. Remove from water and drain.
  9. Label and date, quart size, zip-closure freezer bags.
  10. Pack peas into prepared freezer bags, squeeze out as much air as possible by folding the top portion of the bag over. Gently push air out and seal. Freeze for up to one year at 32°F or below.
Note: Blanching water and ice water bath may be used over and over again. Return blanching water to a boil after each batch of vegetables is blanched and replenish water if necessary.

Recipes

The flavor of fresh garden peas is complimented by spearmint, marjoram, rosemary, and thyme.
They hold up well in stir-fry preparations. Boost the nutritional value of meals by adding them to pasta, soups, stews and rice dishes or raw in a fresh garden salad.
Sugar Snap Peas with Toasted Sesame Seeds
  • 1 tablespoon peanut oil
  • 3 baby portabella mushrooms, sliced (1/2 cup)
  • 2 cups fresh sugar snap peas, fresh snow peas orthawed frozen snow peas cut in half
  • 1 teaspoon soy sauce
  • 1 to 2 tablespoons toasted sesame seed
Wash and string peas, slice mushrooms measure soy and sesame seeds and set aside. Heat oil in a wok or large skillet over medium-high heat. Add mushrooms and stir-fry until lightly browned. Add peas and stir-fry until crisp-tender, about 2 minutes. Stir in soy sauce. Cover and cook 1 minute longer. Sprinkle with sesame seed and serve. Makes 4 servings.
French Peas
  • 3 tablespoons olive oil
  • 1/4 cup finely chopped romaine lettuce
  • 1-1/2 pounds shelled fresh peas or frozen tiny peas, thawed
  • 1/4 cup minced shallots or white part of green onion
  • 1 large whole sprig parsley
  • 2 teaspoons sugar
  • 1 teaspoon salt
  • 1/8 teaspoon white pepper
Heat oil in a 3 quart saucepan. Place lettuce on top of oil. Add peas, shallots, parsley, sugar, salt and pepper. Simmer covered, stirring occasionally, 10 to 15 minutes, or until peas are just tender. Remove parsley sprig before serving. Makes 6 servings.

Thursday, June 7, 2012

It's Strawberry Time....

Growing Strawberries

Strawberries are an easy to grow fruit crop that will reward the home gardener with ample harvests for many years. With favorable conditions, each strawberry plant should produce one quart of strawberries. There are basically 3 types of strawberry plants to choose from: June bearing, Everbearing and Day Neutral. June Bearing strawberries produce a single, large crop per year during a 2 - 3 week period in the spring. June bearers are the traditionally grown plants, producing a single flush of flowers and many runners. They are classified into early, mid-season and late varieties. The largest fruits are generally from June bearing varieties. Everbearing strawberries produce two to three harvests of fruit intermittently during the spring, summer and fall. Everbearing plants do not send out many runners. Day Neutral strawberries will produce fruit throughout the growing season. These strawberries also produce few runners. Everbearing and day neutral strawberries are great when space is limited, but the fruits are usually somewhat smaller than June bearers.

My Gardner Guy's Strawberries....


Red, ripe, and luscious, this popular fruit has lots of vitamin C and health-boosting antioxidants.
Which ever way you choose to add them to your diet, grow them or buy them, strawberries are a must for this time of the year!!!

How to Choose Strawberries: Go for plump, firm, fragrant berries that are shiny and bright red. Avoid any that are bruised or withered or have a dry or brownish cap. The smaller varieties are generally more flavorful. Inspect plastic containers and cartons for stickiness or stains, signs that the fruit inside is damaged or past its prime.                                   

How to Prepare Strawberries: Wash the berries and trim the caps just before using.

How to Freeze Strawberries
Strawberries are sensitive to both heat and cold and are very delicate, so it is wise to ‘put them up’ as quickly as possible.

Here are suggestions for a few different methods for freezing strawberries. I use all of them, as they each have their benefits.


Whole Strawberries


Bags of whole, frozen strawberries are handy to have around for adding to smoothies or baking. This method of freezing on a tray or sheet ensures the berries freeze individually, rather than in an inconvenient brick.
They can be frozen without adding sugar, at a higher risk of getting freezer burn, so it is best to use them up within six months if they are indeed sugar free. Otherwise, a light dusting of sugar before freezing will both help preserve their color and prevent freezer burn.

How to Freeze Whole Strawberries


  1. Wash and gently dry the strawberries. Don’t soak them long in water as this will result in a loss of flavor and nutrients!
  2. Hull the berries and remove any ones that are spoiled. (Save those ones for your coulis, below)
  3. Place the strawberries on a baking sheet, not touching one another, and freeze until solid.
  4. Transfer the strawberries to plastic resealable bags or airtight containers and store in the freezer for up to six months.


Strawberries in Simple Syrup

This tried and true ‘old school’ method calls for freezing the berries whole in a mildly sweet sugar-water. You can use jars or plastic containers to freeze them in.
Packed in liquid, the berries retain their color and shape when reconstituted, making them a standalone dessert. They can also be spooned over yogurt or ice cream, or heaped onto scones and topped with cream for a classic strawberry shortcake that is not lacking in flavor.
Tip 1: Make the simple syrup before you go berry picking or acquire your fruit. It keeps for several weeks in the fridge, and will be waiting, already chilled, for the moment your fresh strawberries arrive.
Tip 2: Add a subtle, natural flavoring to the simple syrup such as orange zest, green cardamom pods, or vanilla bean. Your jar of berries is now a seasonal dessert; thaw, open and eat with a spoon come January for a reminder of warmer days.

How to Freeze Strawberries in Simple Syrup


Make a simple syrup by combining 4 cups water to each 1 cup sugar. Dissolve the sugar in either cold or hot water; if hot water is used, be sure to chill the syrup before using.
Place whole or sliced berries in containers and cover with cold syrup; use about 1/2 to 1/3 cup of syrup for each pint container. Package and freeze.
To Thaw: Thaw in the refrigerator or on the counter. Never immerse frozen jars into hot water.


Strawberry Coulis

Strawberry coulis, or sauce, adds vibrant color and fresh flavor to many desserts, and is well-worth the effort and freezer space. Spoon it over pancakes or crepes, serve it over chocolate cake, or drizzle it over ice cream. No matter how you enjoy it, strawberry coulis offers a large reward for a minimal time investment.
While some recipes suggest cooking the berries or even adding cornstarch, all that is really needed for a tantalizing sauce is a few drops of citrus juice (to bring out the flavor of the berries) and perhaps a sprinkling of sugar if the berries are tart. This is then blended to a smooth consistency and that’s it!
Be sure to set aside some strawberry sauce for a refreshing strawberry-limeade concentrate below!

Recipe: Strawberry Coulis


  • 1 pound strawberries, washed and hulled, about two pints
  • 1 Tablespoon sugar, or to taste
  • 1/2 teaspoon lemon or lime juice
  1. Combine strawberries, lemon juice and sugar in a blender or food processor.
  2. Pulse until berries are somewhat chopped then blend until smooth and the sauce looks glossy. Taste and adjust sugar if needed.
  3. If desired, pass puree through a fine sieve to remove seeds. (I usually skip this step.)
  4. Pour into two 1/2 pint jars, leaving 1/2 an inch of headspace at the top of the jar, and freeze.
Makes 2 cups.
Note: Sauce will also keep up to a week in the refrigerator.


Strawberry-Limeade Concentrate

Turn all your bruised and less-attractive berries into this snazzy summer cooler. By having this concentrate on hand, you can whip up fresh and beautiful drinks at a moment’s notice.

Recipe: Strawberry-Limeade Concentrate

  • 3/4 cup strawberry coulis (recipe above)
  • 3/4 cup sugar or whole cane sugar
  • 1 cup lime juice (approximately 8 limes)
Mix ingredients together and freeze in ice cube trays.
To serve: In a drinking glass, stir together 1 cup cold water and two frozen cubes of concentrate and stir to combine. Enjoy.
                             

Save some of those strawberries and mix you up a fantastic tasty berry shake!!!


Mixed-Berry Shake

Ingredients

  • 1 quart vanilla ice cream
  • 6 ounces unsweetened frozen berries (such as strawberries, blackberries, and blueberries)
  • 2 cups whole milk

Directions

  1. In a blender, combine half of the ice cream, berries, and milk. Purée until smooth, stopping occasionally to stir with a spoon. Pour into glasses. Repeat with the remaining ingredients Mixed-Berry Shake

Wednesday, March 7, 2012

Drying Orange and Lemon peels......


How to Dry Orange or Lemon Peel at Home: It's quite easy.

Prep Time: 30 minutes

Cook Time: 30 minutes

Total Time: 1 hour

Ingredients:

  • Orange peels or lemon peels

Preparation:

 Take a number of organically grown oranges or lemons (which should have untreated, pesticide-free skins), and use a fine-bladed paring knife to trim away just the colored part of the skin, leaving the bitter white part behind. Lay the strips skin-side down on a plate and let them dry at room temperature for 3-4 days, until they have shriveled and are no longer moist. Store the dried peel in a dark place, in a clean jar. To use, either crumble it or whirl it in a blender. You can use the powdered peel in place of extract in baking; in toppings, to flavor sugar-bowl sugar, in spice mixes (e.g. lemon, pepper, rosemary and sage as a barbecue rub), and to flavor sauces of one kind and another.

Lemon Zest and Drying grated lemon or orange peel

Lemon Zest -


The rich outermost part of the rind of an orange, lemon, or other citrus fruit, which can be used as flavoring.

On a lemon, it is the yellow part of the peel (skin) on the outside of a lemon. The zest is shiny, brightly colored, and textured; it is the outer surface of the fruit which consumers can directly see.

The peel of a citrus fruit contains two (2) top layers; the zest (the outermost part of the rind), and the pith (a white, fibrous membrane directly below the zest which helps to protect the fruit inside).

Lemon zest has an intense lemon/citrus flavor with very little bitterness. The bitterness is primarily found in the white part of the lemon (the white pith). The white pith will give your dish a bitter undertaste. Carefully zest your citrus fruits leaving the pith on the fruit.

Before zesting, scrub the fruit with a sponge and warm, soapy water. Rinse it well and dry it with a paper towel.

Zesting a lemon

Lemon Zest


Drying your own.....


Grated lemon or orange peel is often called for in fruit bread and quick bread recipes. The peel, or rind, gives the bread an incredible citrus flavor that can't be found in artificial flavorings. While you'll want to use freshly grated rind as decoration on iced breads,cakes, and cupcakes, the dried rind is just as delicious as fresh rind when added as an ingredient to baked goods.

To make your own dried citrus rind:

  1. If possible, choose organic oranges or lemons, and thoroughly wash and dry the fruit.
  2. Carefully use a citrus grater to lightly grate off only the top layer of the skin. You want only the flavorful orange or yellow part of the peel. Avoid the white pith because it makes baked goods bitter.
  3. Transfer the grated peel to a flat dish or onto a piece of wax paper. Let the grated peel dry overnight, or longer if needed.
  4. The grated oranges and lemons can be juiced for baking or drinking, or you can store the fruits in a plastic bag and keep refrigerated until you are ready to use them.
  5. When the grated peel is completely dry and coarse, store it in a clean, glass jar. Keep out of sunlight to prevent fading.
  6. Crush the peel between your fingers before adding it to other ingredients so as to release the orange or lemon flavor. Use in the amounts called for in the recipe.

Monday, February 20, 2012

Dried Banana Chips...

Banana Chips - Homemade With A Food Dehydrator Versus Store Bought....

Once you dry these you will always want them in your pantry....it's easy, tasty and good for you.

Homemade Banana Chips Are 100% Natural
By Food-Dehydrator.com
Banana chips are a great tasting, healthy snack that can be easily made with a food dehydrator. Banana chips’s basic ingredients should consist of:
  • ripe or slightly overripe fruit

  • if desired, lemon or lime juice (I never use)

To make banana chips: Peel the bananas and cut them crosswise into about 1/4 inch thick chips. If desired, before dehydrating, you can dip the banana chips into lemon or lime juice to help prevent browning post drying. If the bananas are pretreated with citrus juice, make sure they are well drained and dried before placing them in the food dehydrator. Dry the banana chips at 130 degrees Fahrenheit for up to 8 to 10 hours. The chips should feel dry and leathery when done.
Homemade banana chips are a wholesome, healthy, 100% fruit snack that are easy and fun to make. They are very sweet and have an intense banana flavor due to the food’s reduced water content which intensifies the fruit’s natural sugars.
In contrast to homemade banana chips, store bought dried bananas are typically deep fried in unhealthy oils, like coconut or palm oils. These oils contain high amounts of saturated fats. Further store bought banana chips can be covered with additional sugars or honey. In fact, Self Nutrition Data lists a 3 ounce serving of fried banana chips as containing 44% of the daily recommended amount of fat and 123% of the daily recommended amount of saturated fat.
To recap:
Homemade banana chips – 100% fruit, 100% natural ingredients and sugars
Store bought banana chips – Fruit, but also unhealthy saturated fats and added sugars
Go with the real thing – home made banana chips made with your food dehydrator

Loving mashed potatoes the Irish Way!!!

You can use kale instead of cabbage, but I personally prefer the softer and sweeter taste of cabbage. Colcannon is traditionally topped with...