Sunday, July 28, 2013

Make room for a crunchy cabbage salsa!!!

Upon one of my visits to a small Nevada town to see my Father we stopped to eat at a small Mexican restaurant...they serve their chips with two salsa's a red salsa and a cabbage salsa. My Gardner Guy and I loved it so I attempted to make our own from the cabbage, peppers, onions, cilantro and tomato's he has grown this year. So tonight for dinner we had our taco's, chips and cabbage salsa and the first pickings of the corn he is so proud of!!!


My Gardner Guys Cabbage salsa:
  • Cabbage  (purple or green I have used both)
  • Onion  (I like green onions the best but any onion works)
  • Jalapeno (seeded)
  • Cilantro
  • Tomato (seeded)
  • Salt
  • Fresh lime juice
  • Cumin
  • a little oil
  • At times if you have it available I have added any color of bell peppers....just for more color
Directions:
  1. Finely chop all of the ingredients and add them to a bowl. Stir to combine.
The amounts you use can vary depending on your preference. Cabbage is the base  so you’ll want to use the most of that and then add everything else to taste. Tomatoes are the typical base for most salsa and really the only reason I choose to use them  here is to add a little color and they add a little extra liquid. Start with a few cups of cabbage, 1/4 cup onions, 1/2  cup jalapenos, 1/4 cup  finely chopped cilantro, 1/2 cup or more of tomato, and bell pepper for color,  the juice of one lime.  Add the lime juice a little at a time... to the taste that you like. Cumin to taste and just a small amount of oil.  For the best flavor make this 30 minutes or so before you plan to serve it to allow the juices to come out and the flavors to blend together. This salsa is best when served fresh but you could store it in the refrigerator for a few days.

I like this salsa so much I use it for the making of taco's...over the ground beef cooked in My Gardner Guy's salsa verde.

Countries like El Salvador, Honduras and Mexico might call this dish Chimo, they would serve it over meats, fish, chicken, beef, and pork...it works well with them!!!
 

Thursday, July 18, 2013

A simple twist on a BLT....Bacon, Lettuce and Tomato Salad....

With lettuce and tomato's being so abundant during My Gardner Guy's garden growing season this is a must have on our lunch or dinner table!!!
 
Ingredients
For the salad:
1 head romaine lettuce, thinly sliced (about 6 cups) this is even good with a mixture of greens and spinach
1/2 cup chopped red onion
2 Roma tomatoes, seeded and chopped, or cherry tomatoes
4 slices white bread
1 tablespoon butter

For the bacon:
1/4 cup packed light brown sugar
1 teaspoon  paprika
Grated zest of 1 lemon
1 teaspoon black peppercorns, crushed in a bag with a mallet, or coffee grinder
6-8 strips center-cut bacon
6-8 sprigs fresh thyme

For the dressing:
1/2 cup mayonnaise
1 to 2 tablespoons tomato jam or you can use maple syrup, I love the tomato jam version....(see this link for Tomato Jam...http://mygardnerguy.blogspot.com/2011/10/tomato-jamgreat-for-appetizers-and.htm )
3 teaspoons whole-grain mustard
1 tablespoon fresh lemon juice

Directions:
Preheat the oven to 350 degrees F. Combine the lettuce, onion and tomatoes in a large bowl; set aside.


Start out: Cutting the bread into crouton-size cubes. Melt the butter in a skillet over medium heat. Add the bread cubes and toast, tossing, until golden, about 6 minutes. Set aside to cool.

Make the bacon: Mix the brown sugar, paprika, lemon zest and crushed pepper in a small bowl. Add the bacon and press to coat on both sides. Line a baking sheet with parchment paper; place the thyme sprigs on the parchment paper, then lay a strip of bacon on top of each sprig. Bake until the bacon is caramelized and crisp, about 20 minutes. Let cool slightly on the baking sheet. Cut the bacon into bite-size bits using scissors; add to the bowl with the lettuce. Discard the thyme.

Make the dressing: Whisk the mayonnaise, syrup  or jam, mustard and lemon juice in a medium bowl. Add the dressing to the salad and toss. (This is enough dressing for the whole salad, but you can use less if you want a less wet salad.) Sprinkle the croutons on top and eat.

Additional notes: Sometimes I will use additional seasonings on my croutons, like a small portion of the mixture used on the bacon, I often grind up sun dried tomato and add it to the mixture of seasoning. I also have use in place of fresh thyme 1 tsp of ground thyme and instead of cooking on a baking sheet I prefer just mixing the mixture of dry ingredients in with the bacon as it is cooking in a skillet.... both ways are delicious.
Also I save my odds and ends of breads, meaning left over hot dog buns, hamburger buns, the heals to a
loaf of bread...freeze them and save for making  croutons.
Georgie

Wednesday, July 17, 2013

Soup is always good with the tomatillo in it!!!

I am going to be busy the next few weeks being a grandma to four grandcritters under the age of eight. Like most children they can be really picky at what they eat. Having a garden helps spark their interest to sometimes try other foods. It is not always easy but I hope that my introduction's to them one day at a time they will grow up learning how to make healthy choices in the foods they eat.
That pretty green tomatillo works and pairs well in chicken soup. Notice by the list of ingredients there is a lot of items that can be pulled right from the garden making this a pretty fresh dish. Some like soup in the fall and winter weather, I enjoy it even in the summer but mostly on a overcast day....it feels and taste good!!!
So that is what I am preparing today yummy soup because it smells like rain is coming!!!
Maybe a loaf of French bread served up with some pesto....


Tomatillo Chicken Soup


Prep time:
Cook time:
Total time:

Serves: 4-6

Ingredients
  • 6 medium tomatillos, husks removed and rinsed
  • 1-1/2 lb. skinless, boneless chicken breast halves
  • 1 -32-oz. box chicken broth
  • 1 medium green sweet pepper, chopped
  • ½ cup chopped red onion
  • 1 stalk celery, chopped
  • 1 4-oz. can diced green chiles
  • 2 Tbsp. snipped fresh cilantro
  • 1 fresh jalapeño pepper, seeded and minced*
  • 1 Tbsp. ground cumin
  • 1 Tbsp. lime juice
  • 2 tsp. chili powder
  • 2 cloves garlic, minced
  • 1 tsp. salt
  • 1 tsp. ground black pepper
  • Dairy sour cream, chopped green onion, chopped red sweet pepper, sliced jalapeño peppers, snipped fresh cilantro, and/or tortilla chips (optional)

Instructions
  1. Chop three tomatillos. Place remaining tomatillos in blender. Cover; blend until smooth.
  2. In a 3-1/2- or 4-quart slow cooker combine pureed and chopped tomatillos, chicken, broth, sweet pepper, onion, celery, chiles, cilantro, jalapeño, cumin, lime juice, chili powder, garlic, and 1 tsp. each salt and pepper.
  3. Cover; cook on low for 6 to 7 hours or high for 3 to 3-1/2 hours.
  4. Remove chicken; let stand until cool enough to handle. Shred chicken; return to soup.
  5. If desired, top with sour cream, additional chopped red sweet pepper or jalapeño peppers, snipped cilantro, and/or tortilla chips.

Friday, July 12, 2013

Move on over hot dog relish the Tomatillo's and chile peppers are moving in!!!


Tomatillos have become a regular item in our home. I must confess I never knew what they were growing up. I have wondered why and upon my research I think it's because their origin is from Mexico...we are catching on to this pretty fruit. Tomatillo (L is often silent)  has been gaining popularity in the United States (that's why I guess they just were not popular yet). It looks similar to tomatoes but has meatier flesh than tomatoes. The out side of this fruit is sticky and covered by husk like in cape gooseberry fruits. I have found in my research for recipes to try that many Mexican dishes contain liberal use of tomatillos. Tomatillos are still not a mainstream ingredient but most of us have enjoyed dishes made with it, such as salsa verde (green salsa) or many other Mexican dishes. I love their color and their cute little husk they grow into. They have become a welcomed addition to My Gardner Guy's garden and my kitchen counter to be made into something yummy!!!

So I had 17 lbs to cook up....it made out to be about 26 cups....what to do I say....
I use it in two different canning recipes,  the 1st. one My Gardner Guy's tomatillo salsa, being a eating salsa with chips and a topping for the following recipe. Serve this at you next out door cook out and your guest may be talking about it for months!!!


Hot Dogs with Poblanos, Pepper Jack, and Tomatillo
Thanks to bonappetit's test kitchen for thi recipe to try out!

Ingredients
  • 2 tablespoons olive oil
  • 3 poblano chiles, cut into 1/2-inch-wide strips (again I use a mixture of what I may have in the garden)
  • 1 large onion (about 12 ounces), sliced
  • 6 uncured hot dogs or flavored sausages
  • 1 cup of my Gardner Guy's (tomatillo salsa) (or a purchase store brand)                                           
  • 1/3 cup chopped fresh cilantro
  • 6 hot dog buns
  • 2 ounces hot pepper Monterey Jack cheese, thinly sliced
  • Crumbled Cotija cheese or feta cheese

Preparation

  • Heat oil in large nonstick skillet over medium-high heat. Add poblanos and onion; sprinkle with salt. Sauté until chiles soften, 10 to 12 minutes. Transfer mixture to bowl. Add hot dogs to same pan. Add 1 cup water; cover. Boil until heated through, 5 minutes.
  • Meanwhile, preheat broiler. Combine salsa verde and cilantro in small bowl.
  • Place 1 hot dog in each bun; place on baking sheet. Cover each with slices of cheese. Broil until cheese melts, about 2 minutes. Top with chile-onion mixture; then Cotija cheese and salsa.
  • For a change  I think I will grill up some brats tomorrow and try My Gardner Guys salsa and pepper and onions from the garden!!!

My Gardner Guy's tomatillo salsa

Makes 6 half-pint jars

3 pounds tomatillos, chopped (weight after husking and washing)
1-1/2 cup chopped onion
5 serrano chiles, minced (not seeded or deveined, unless you want a milder salsa)
1 medium fresno or red jalapeño, minced (not seeded or deveined)
I use a mixture of peppers I have in the garden....
6 cloves garlic, minced
1T ground cumin
3/4 tsp salt
1/4 cup cider vinegar
1/4 cup lime juice

Prepare a boiling-water canner: Fill it half full of water and heat to a simmer. Keep canning jars and lids warm in simmering water.

Combine all salsa ingredients in a large saucepan. Bring to a boil, then reduce heat and simmer 10 minutes. Pass the simmered salsa through a food mill fitted with the largest disc. Return the milled salsa to pan and bring back to a simmer. Adjust salt and seasoning as needed.

Ladle hot salsa into clean, hot jars, leaving 1/2-inch headspace; remove air bubbles and wipe rim. Center hot lid on jar; apply bands.

Place the filled jars in the canner, and bring to a rolling boil. Process at a full boil, uncovered, for 15 minutes. At the end of processing time, turn off heat and raise the canning rack to the upper level and let jars sit above the water for ~5 minutes to gradually stop boiling. Remove jars to a cooling rack, and leave undisturbed until thoroughly cool. Check lids for seal after 24 hours. Lid should not flex up and down when center is pressed.

The 2nd thing I made was My Gardner Guy's Chile Salsa Verde

 I love  Chile Salsa Verde....I use it in my meat for taco's....I love the taste and now stay away from all the other taco seasonings. The following is a stronger tasting salsa verde recipe I use just for cooking.

 My Gardner Guy's chile salsa verde

 18 poblano and Hatch chiles (I use a mixture of what I grow in the garden for
Salsa) about 4 cups
10 cups/4 lbs coarsely chopped, husked tomatillos with juice
2 cups coursely chopped onions
1 1/2 cups fresh lime juice (12 limes)
1 cup chopped cilantro
1 cup water
6 cloves garlic, minced
2 teaspoons salt


Directions 1. Place the chiles on a hot grill and roast, turning throughout, to blister the skins, about 15 minutes.
2. Discard the membranes and seeds from the chiles. Chop the chiles coursely and combine with the tomatillos in a heavy nonreactive saucepan.
3. Bring the mixture to a simmer and add the onions, lime juice, cilantro, water, and garlic. Cook over medium heat, stirring occasionally, allow to cook down, reducing the extra liquid and become thicker....
4. Add salt. Stir well.
5. Ladle into hot, clean jars. Cap and seal.
6. Process in a boiling water bath canner for 30 minutes.

Georgie

Thursday, July 11, 2013

Life with My Gardner Guy.....

July 10, 2013 My Gardner Guy's garden

Many have asked me this question, what do I do with all the stuff..... meaning produce that My Gardner Guy grows. Our neighbor's are usually in awe at how awesome his garden looks and they all ask what his secret is. The truth is I don't know!!! I think the more I toot about him (meaning brag) he works at growing more and more produce. Each year he is trying to make something just a little bit better. I do know he spends a lot of time working in his garden I know he loves it, it's his hobby, his exercise, his way of working out life's stress, his baby. Why, well it started 6 1/2 years ago the summer of 2007 as we got married in the spring. I love cooking; A LOT.....maybe he decided if I was going to cook A LOT he better grow some of the supplies to keep me from the grocery stores. Or maybe it was that big fruit and vegetable stand we visited one Saturday while he was showing me off and showing me the surrounding areas of his stomping grounds. We were still in the honeymoon stage (at times we still are) and that day he spent a good portion of money on zucchini, peppers, onions, garlic, apples and a few (well maybe a lot) of other things. I can't recall every thing I loaded up on to cook for him but I was from Las Vegas and seeing so much lovey produce all grown from the local farmers I was in PRODUCE HEAVEN. I think just maybe he thought WOW I better start this new wife of mine a garden. What ever the motivation factor was he did and I quite enjoy it. As far as what do I do with all the stuff, well keep following me and come visit My Gardner Guy's garden, my kitchen blog and food articles and I will show you.

But first let me toot about My Gardner Guy!!! He plants the peas every year President Days weekend....no matter sometimes what the weather may be.

This year in Feb. 2013 we had a lot of snow so he dug out were he wanted the peas to be planted and waited a week for the ground to thaw...

 
For Christmas his wife buys him a seed planter...New Toy to try out!!!
Onions and garlic are planted in the fall so by the end of April they are starting to come up...
He has all his seeds ready to go...this year many types of pumpkins!!!


Most of  his planting is done in the middle of May 2013


Then he watches, he weeds, he waters and waits to see the fruits of his labors blossom
 
Notice the garlic and onions now June 2013
the peppers and tomatoes in the back ground

 
The first of June the Rhubarb is ready
June 12, 2013


By the middle of June My Gardner Guy has brought me radishes, lettuce, spinach, peas, green beans and the first of many cabbages...

 
Like I said the first of many cabbages...

 
July 10, 2013


Remember those pumpkins....July 10, 2013


Notice the onions, tomatoes and peppers....July 10, 2013
the garlic has been pick


So now until Fall my kitchen starts to look like this!!!
See my big bucket of lovey garlic...and those really pretty onions...
 

Notice our first of many peppers and tomato's


So this month my list is long, salsa, salsa verde, green beans, pasta sauce, pickled garlic, more pesto, and more!!!


There will be a pot or two or three on the stove many days this next few months!!!

I am looking forward to trying out a few new recipes....I promise to share!!!

Tuesday, July 9, 2013

What to do with those radish greens think "Pesto"

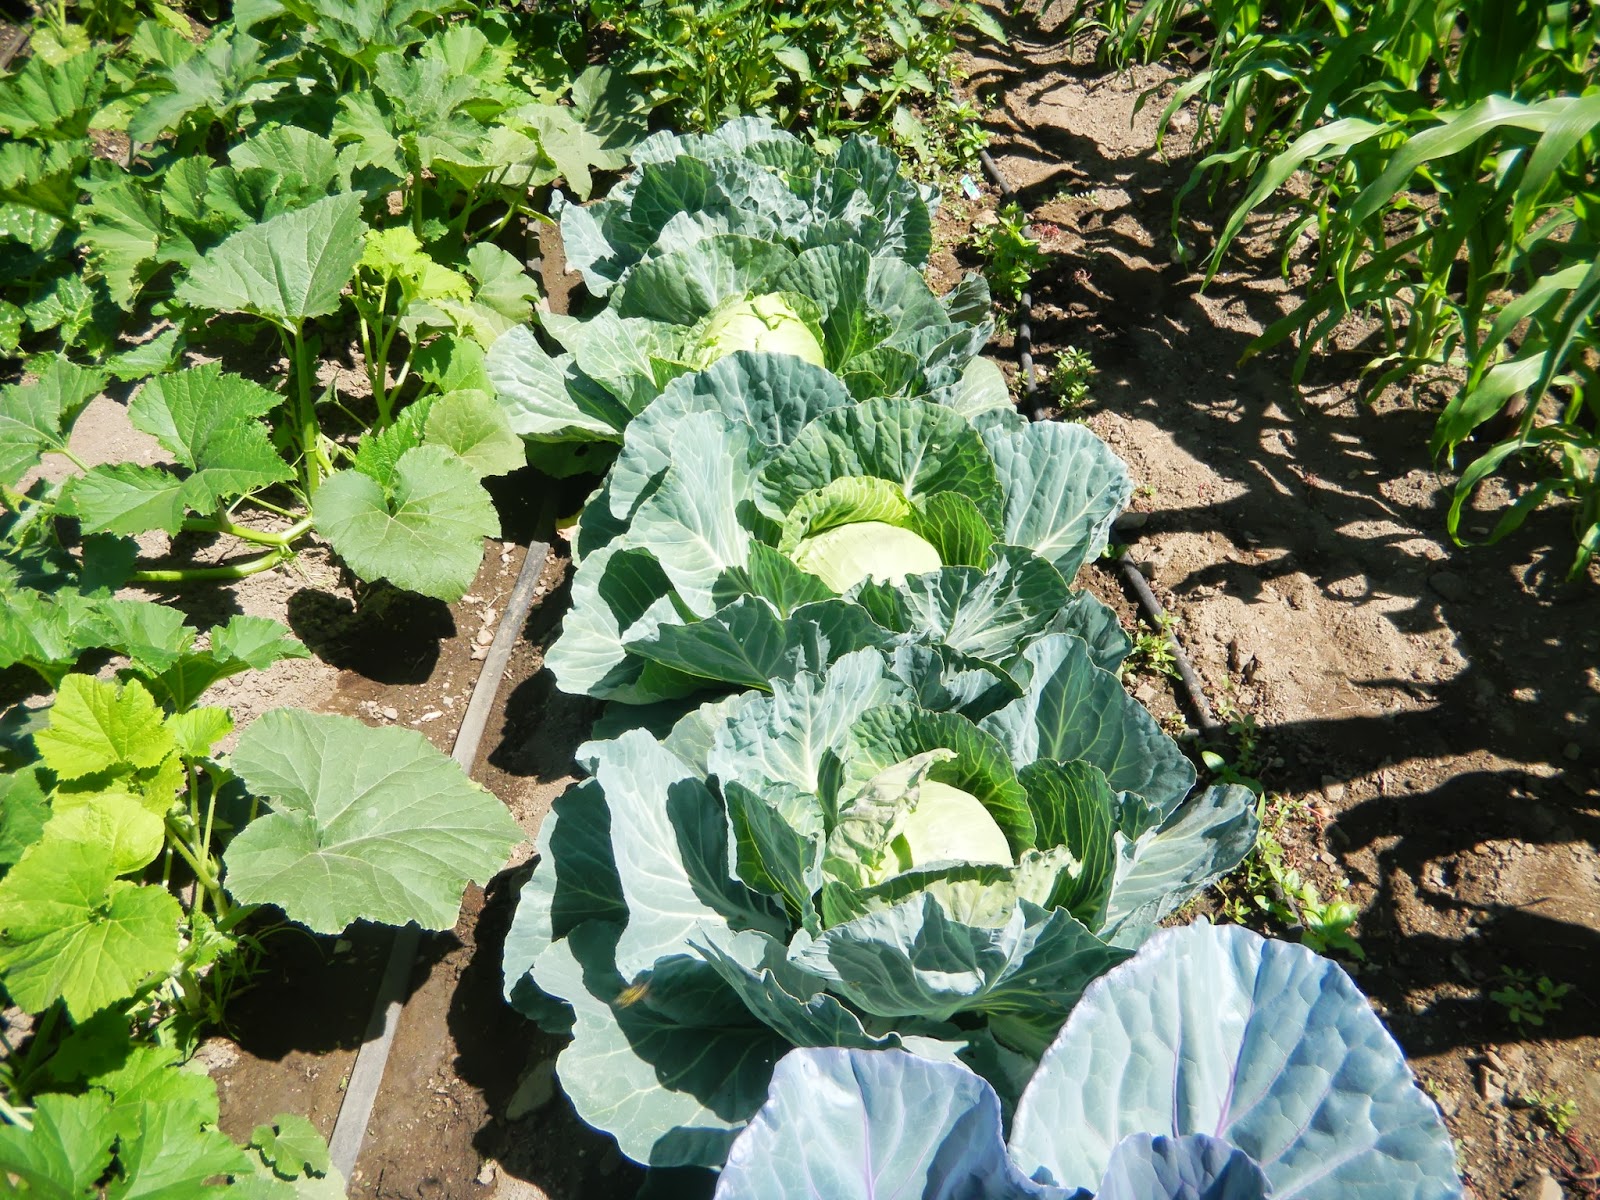
My supply of basil this year in the garden is not much....I am a little disappointed as I love pesto with basil in it.....it is my favorite. I have learned over the past few garden seasons sometimes what grows good one year in one spot when you rotate your plantings it might not do so good the next time in a different location. That is were we are this year...our basil is planted between our corn and pumpkins and both have crowded this wonderful herb out. So, I am using my radish greens....yes you can use other greens to make pesto.


Basil Pesto, Swiss Chard Pesto, Beet Greens Pesto and Sun dried Tomato Pesto

And now Radish leaf...
Recipes below....

A few years back I got my first taste of Pesto...I wondered wow where have you been all my life.

What in the heck is that green stuff called pesto anyway? The Italians have birthright to this great tasting green sauce that is generally made with basil, garlic, salt, Parmesan cheese, pine nuts (can be omitted if you have a nut allergy) and olive oil. Because of the high cost of pine nuts I have seen many recipes using walnuts and also almonds. Not only is pesto healthy, but it also has endless uses. Pesto is actually very easy to make, but you can buy it in any grocery store too. If you do make it on your own the good news is that pesto freezes very well, so you can make a big batch and store it for future use. That is what I do...

While doing some web searching I came upon this article which had some helpful hints in regards to Pesto...I liked it and wanted to share it along with some of my thoughts.

A quick word of caution: Don't overuse pesto — it can be quite overpowering and leave your recipe looking like a St. Paddy’s Day brawl in no time flat. If you’re unfamiliar with where to use it, here’s a slew of ideas to get you going:

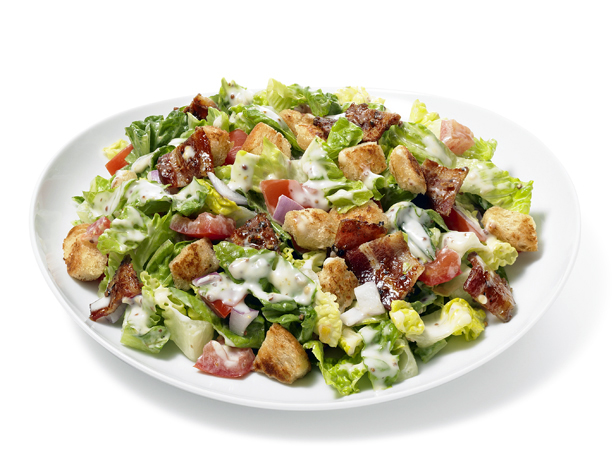
1. Pesto Bread: It doesn’t get easier than this. Just a smear of pesto and you’ve got a great variation on garlic bread. These take just 25 minutes to make from top to bottom and would make a great dinner appetizer, too. In fact one day I went to my Father in law's to borrow his kitchen...(my kitchen  was under contruction) they have never had PESTO!!! So I took some crusty bread...toasted it after rubbing a little garlic clove and drizzling some olive oil on each piece. Then added the freshly made Basil Pesto. They loved it...cost me a jar of pesto, they wanted the good green sauce!!!

2. Green Pizza: Pesto on pizza is just a natural. Don't even worry about making the pizza at home, you can just as easily jazz-up your take-out pizza with a spritz of pesto for added flavor and cool color. But if you do decide to make your own pizza at home with pesto, beware you may never order take out pizza again!!!

3. Pesto Pasta Salad: Hot or cold pasta will gather some great flavor with the addition of some pesto. There are literally dozens of ways to use pesto in pasta, so you shouldn't be afraid to add it to your dishes.

4. Grilled Shrimp: Fire up your indoor grill or BBQ if you’ve got one, and brush on a bit of pesto for a pretty and healthy dish. Just a few minutes of work yields an inventive twist on ordinary shrimp.

5. Pesto Steak: A little of the green stuff goes a long way on a steak.

6. Potatoes: Whether baked or mashed, pesto is a delightful twist on the ordinary.

7. Marinade: Pesto rocks as a marinade on either chicken or fish. This same recipe can be used for either one.

8. Scrambled Eggs: Add some punch to tiresome eggs with a touch of pesto and you’re on your way to an appealing variation that will add some energy to breakfast.

9. Soup and sauces... If you haven’t heard of pesto soup, then you’re certainly missing out.

10. I love Pesto on my grilled chicken as a garnish...or chicken on my Pesto...I simply grill the chicken breast, then use a big spoonful of pesto on top, add a tomato relish on top of the pesto and it's a beautiful main entree dish of color and taste...

Final Notes: Pesto can be made in lots of different ways (and comes in plenty of variations as well), so you don’t have to stick to the traditional basil recipe by any means. You’ll see versions with parsley, sun dried tomatoes (often called red pesto), red peppers, spinach, beet greens, radish greens, Swiss chard greens, and on and on. Let your imagination run wild. It has been noted that the best way to make pesto is the old fashion way by using the sharp kitchen knife. If you have the time great...but using the processor will do. There is plenty of taste in this sauce/pesto regardless which method one uses....

So I would like to hear what are you using pesto for? Ideas are fun to share...


Radish Leaf Pesto.....more greens to use!!!

- 2 cups handfuls of good-looking radish leaves, stems removed
- heaping 1/2 cup hard cheese, such as pecorino or parmesan, grated or shaved using a vegetable peeler
- heaping 1/2 cup nuts, such as pistachios, almonds, or pine nuts ....I use half in half sometimes like to day I used pine nuts and walnuts...
- 2-4 cloves of garlic
- a short ribbon of lemon zest cut thinly from an organic lemon with a vegetable peeler (optional)
- 1/2 cup, plus more to get the consistency you like
- salt, pepper, (ground chili pepper this is optional as sometimes radish greens already have a bite to them)
Put all the ingredients in a food processor or blender or mini-chopper, and process in short pulses until smooth. You will likely have to scrape down the sides of the bowl once or twice. This produces a thick pesto; add more oil and pulse again to get the consistency you prefer. (This can also be done with a mortar and pestle; it's great for your karma and your triceps.)
Taste, adjust the seasoning, and pack into an airtight container and use or freeze. I have learned that it is best for me to use smaller containers so this time I use some little mini containers I found at the dollar store. They hold 2.3 ounce's each.


Other Recipes....


Sun Dried Tomato Pesto

Yield: About 1 Cup

1/2 cup packed basil leaves
1/2 cup toasted whole almonds
4 garlic cloves
1 tsp lemon zest
1/4 tsp coarse salt
1 generous packed cup sun-dried tomatoes in oil
1/4 cup grated parmigiano reggiano cheese
1 cup olive oil

1. Drain your sun dried tomatoes, lightly rinse them, and then pat them dry with a paper towel.
2. Toast your almonds in a dry shallow pan. They will take about 10 minutes, and you will smell when they are done.
3. In a large food processor, combine the basil, toasted almonds, garlic, lemon zest, and salt. Process until coarsely chopped.
4. Add the sun dried tomatoes and parmigiano reggiano cheese and process until the tomatoes are coarsely chopped.
5. Now stream in the olive oil slowly and process until the pesto comes together.
6. Serve immediately or store in an air tight container in the fridge for up to 6 weeks. Or freeze....

Swiss Chard Pesto

•2 tablespoons + 1/2 cup extra virgin olive oil
•2 cloves garlic, chopped
•1 bunch Swiss chard, stems removed (about 2 cups)
•1 cup walnuts
•2 ounces freshly grated parmigiano reggiano cheese
•1 bunch of basil leaves (about 1/2 cup packed)
•Kosher salt

Heat two tablespoons of oil and the garlic in a saute pan over medium heat. Once the oil is hot and the garlic has become fragrant, gradually add the Swiss chard, wilting it into the oil and sauteing for a few minutes. Set aside to cool.
Combine the walnuts, parmigiano reggiano cheese, and basil leaves in the bowl of a food processor. Add in the cooled chard and garlic. Pulse to roughly chop and combine the ingredients. Then, stream in the remaining 1/2 cup of olive oil while blending to your desired consistency. Adjust seasoning with salt.

Beet Green Pesto:

Beet greens – from about 6 beets
1/2 cup light packed fresh basil leaves
1 clove garlic
1/2 cup hazelnuts – toasted
1/2 cup Parmigiano-Reggiano cheese – grated
3/4 cup olive oil (more or less depending on taste and texture)
Kosher salt
Fresh cracked pepper

Blanch beet greens and squeeze water from the greens. Add the greens, basil, and hazelnuts. Chop until fine. Add Parmigiano-Reggiano and stream in olive oil till desired consistency is reached. Season with kosher salt and fresh cracked pepper.

To blanch greens you simply cut away any woody stems and just use the green portion of the stems. Wash thoroughly and set aside. Get a large pot and put it on the stove until boiling. Set another large bowl full of ice water next to the stove. Add greens to boiling water, leave in for 10 seconds, remove and immediately put into ice water. Then drain. Blanching helps soften the beet greens without losing the color.


Basil Pesto

1/2 cup olive oil
1/2 cup grated Romano or Parmesan or parmigiano reggiano
2-4 garlic cloves
2 cups or more of fresh basil
1/2 cup of walnuts or pine nuts

Blend until desired consistency
salt and pepper to taste

It's that easy!!! It's that good!!!


Georgie


Friday, July 5, 2013

The cabbage made for delicious stuffed cabbage rolls...A Welcomed new favorite!!!

 
My Gardner Guy can grow the Cabbage...
 
Look what's ready to be picked....

I am looking forward to giving my kids some beautiful big cabbages...


The first year we planted a garden I mentioned to My Gardner Guy that I wanted some cabbage, he wasn't quite sure he would like eating this beautiful green treat but after fixing him a nice cole slaw he became hooked. My only problem now is getting him to plant a few at a time, (staggered the plantings) a few weeks apart by planting another crop, then another so that through out the summer we can enjoy the cabbage longer.... This is something we now are working on, every year we learn more about the art of gardening. Besides gardening I have also have enjoyed learning different ways to prepare the food we grow.  I have been wanting to make some stuffed cabbage rolls, years ago I tasted some that were pre made and sold through the diet center. I liked them, so it got me thinking about how I would make my own. I surf the internet for some  recipes, there is a lot of different ways to prepare cabbage rolls. I pull out  my radish green, beet greens, a zucchini, onion scapes, peppers, celery, garlic and beet greens. I figures this would make a great mixture with the lamb, round beef and turkey meats that I bought.
Preheat oven to 375 degrees, prepare a flat baking dish or casserole with nonstick pan spray.

I use a mixture of the following above ingredients...sauté in oil lightly
Season to taste
I had about 1-1/2 cups of a mixture of sauté vegetables
 
I often use a mixture of meats when I make a meatloaf, I thought a mixture of meats would be a nice texture in my cabbage rolls. I also notice while surfing the internet many recipes use a variety of meats
 

Use the outer leaves of your cabbage
 
 
Blanch the cabbage leaves by immersing them in a pot of boiling water for 1 minute; drain and pat the leaves dry.
 
Divide the meat into  equal portions to match the cabbage leaves; if you desire and if the bottom of the cabbage leaf near the core is not soften by the blanching cut a V-shape into it and remove it. (not shown in this picture)
 
Roll or fold the leaves around filling; much like wrapping a burrito, if need be secure each cabbage roll with wooden toothpicks
 
Snug and all tucked in
 
I chose to use My Gardner Guys roasted red pepper sauce for the topping, many recipes call for diluted soup or tomato sauce the roasted red pepper sauce would be perfect....for his recipe see the following link...http://mygardnerguy.blogspot.com/2011/11/roasted-red-pepper-spread.html#links
 
Bake covered for 1 hour and 15 minutes or until the cabbage is tender to your liking...


There's a great divide among aficionados about the right way to make stuffed cabbage: enormous logs, small rolls, a variety of different red sauces, stove-simmered, oven-baked. The debate is endless, but there's no doubt that this deli classic can be a make-ahead favorite in your home. Much like the cabbage cole slaw that My Gardner Guy now loves he says these cabbage rolls are another dish to add to our home...

Loving mashed potatoes the Irish Way!!!

You can use kale instead of cabbage, but I personally prefer the softer and sweeter taste of cabbage. Colcannon is traditionally topped with...