Saturday, January 21, 2012

My Gardner Guy's Cherry Cheese Pie......


This has been a family favorite for years...and years...
In the past and still at times I have use store bought cherry pie filling. Now that I have a cherry tree I use our cherries!!!

Ingredients
  • 8 ounce pkg cream cheese, softened
  • 14 ounce can sweetened condensed milk
  • 1/3 cup lemon juice
  • 1 8 0z tub of cool whip or other whipped topping
  • 1 store bought graham cracker crust, or make your own... 
  • 1 Can of pie filling of your choice or if you have other pie filling use it.
Instructions

Place your softened cream cheese in a mixing bowl and add your sweetened condensed milk.


Add in your lemon juice


Mix well and allow to sit for around ten minutes before folding in cool whip


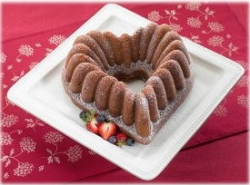
After folding in cool whip put into pie crust


Looking good!!!


Cover and chill a few hours then add you favorite topping and serve...


Taste as good as it looks!!!


  • TOPPING VARIATIONS


  • BLUEBERRY: Omit cherry pie filling. Combine 1/4 cup sugar and 1 tablespoon cornstarch in medium bowl; mix well. Add 1/2 cup water, 2 tablespoons lemon juice then 2 cup fresh or dry-pack frozen blueberries, thawed; mix well. Bring to a boil; reduce heat and simmer 3 minutes or until thick and clear. Cool 10 minutes, stirring constantly. Cool 15 minutes. Spread over pie. Chill thoroughly.
  • CRANBERRY: Omit cherry pie filling. Combine 1/3 cups sugar and 1 tablespoon cornstarch in medium saucepan. Add 1/2 cup plus 2 tablespoons cold water and 2 cups fresh or dry-pack frozen cranberries; mix well. Bring to a boil; reduce heat and simmer 10 minutes. Spread over pie. Chill thoroughly.
  • FRESH FRUIT: Omit cherry pie filling. Just before serving, arrange well-drained fresh strawberries, banana slices (dipped in lemon juice and well drained) and blueberries on top of chilled pie. Brush fruit with light corn syrup if desired.
  • AMBROSIA: Omit cherry pie filling. Combine 1/2 cup Smucker's® Peach or Apricot Preserves, 1/4 cup flaked coconut, 2 tablespoons orange juice and 2 teaspoons cornstarch in small saucepan; cook and stir until thickened. Remove from heat. Arrange fresh orange sections over top of pie; top with coconut mixture. Chill thoroughly.


  • Thursday, January 19, 2012

    Valentine Sweetness....

    We have a bit of wintering weather but it still feels good to have Valentines approaching...there are so many ways to tell those you love...I Love You...


    I find myself gathering all the heart shape pans, heart shape cookie cutters, packing goodies...it is time to make some goodies for the one's I love!!!


    Use up your left over candie canes from Christmas to make this sweet treet.


    Candy cane suckers featered in the Family Fun magizine from the Idea Room...see link, this is a sweet idea to use up candy canes from Christmas...if you have any, or can find some in the after Christmas sales!!!

    The many things you can do with heartshape pans....over the years I have collected a few!!!


    If cookies and cakes are not in the works a simple cup cake will go a long ways!!!

    How simple is this....
    Remove the cellophane wrapping from the canes and form hearts by placing them hook to hook and tail to tail on a nonstick baking sheet or one lined with parchment paper. Bake at 350°F for 2 to 4 minutes (depending on the canes' size) or until they stick together when you pinch the ends lightly. Cool thoroughly and remove with a spatula. If you want to make flat hearts with psychedelic stripes, bake for 8 to 10 minutes.


    It's time to mix up some love in your KITCHEN!!!!


    Sour Cream Sugar Cookies with sweet butter cream frosting....

    Yield: 5-6 dozen sugar cookies
    Prep Time: 25 minutes
    Cook Time: 7 minutes
    Lofthouse sugar cookies with buttercream frosting. These soft and fluffy sugar cookies are perfect for Christmas, Valentine's Day, or any occasion.


    Ingredients:

    For the Cookies:
    6 cups all-purpose flour
    1 teaspoon baking soda
    1 teaspoon baking powder
    ½ teaspoon salt
    1 cup unsalted butter, at room temperature
    2 cups granulated sugar
    3 large eggs
    2 teaspoons vanilla extract
    1½ cups sour cream
    For the Buttercream Frosting:
    1 cup unsalted butter, room temperature
    1 teaspoon vanilla extract
    4 cups powdered sugar
    Pinch of salt
    6 tablespoons heavy cream
    Food coloring, optional
    Sprinkles, optional


    Directions:

    1. In a large bowl whisk together the flour, baking soda, baking powder and salt; set aside.
    2. In the bowl of a stand mixer, cream the butter and sugar together at medium speed until light and fluffy. Add the eggs, one at a time, beating until each is incorporated. Add the vanilla extract and sour cream and beat at low speed until combined.
    3. Add the dry ingredients and beat at low speed until just combined, scraping down the bowl as needed. Dough will be a little sticky and that is ok. Divide dough into two sections. Flatten into rectangles about 1½ inches thick, then wrap with plastic wrap. Chill in the refrigerator overnight or for at least two hours.
    4. Preheat the oven to 425 degrees F. Line large baking sheets with parchment paper or Silpats; set aside.
    5. Lightly flour the countertop and the top of the dough. With a rolling pin, roll the dough out to ¼-inch thickness. Using cookie cutters, cut out the cookies and place on prepared baking sheets. Bake for 7 minutes, until cookies are slightly golden around the edges. Immediately transfer cookies to a wire rack to cool. Cook cookies completely before frosting.
    6. To make the frosting, in the bowl of a stand mixer fitted with the paddle attachment, cream together the butter and vanilla extract. Slowly beat in powdered sugar and the pinch of salt. Once smooth and creamy, add in heavy cream, 1 tablespoon at a time, then beat at medium-high speed for a minute or two until light and fluffy. Add food coloring, if desired, and beat until combined.
    7. Once cookies have cooled completely, frost and add sprinkles, if desired. Allow frosting to set, then store in an air-tight container.

    Thursday, January 12, 2012

    Valentine...Valentine...Valentine's

    Peanut Butter Blossoms
    (Valentine's Day Style)

    * Heart shaped Chocolates (we used dove milk chocolates and reese's peanut butter hearts ; I also noticed hersey has a chocolate heart out this Valentines)
    * 1/2 cup shortening
    * 3/4 cup creamy peanut butter
    * 1/3 cup granulated sugar
    * 1/3 cup packed light brown sugar
    * 1 egg
    * 2 tablespoons milk
    * 1 teaspoon vanilla extract
    * 1-1/2 cups all-purpose flour
    * 1 teaspoon baking soda
    * 1/2 teaspoon salt
    * granulated sugar

    1. Heat oven to 375 degrees. Remove wrappers from chocolates.

    2. Beat shortening and peanut butter in large bowl. Add 1/3 cup granulated and brown sugar; beat until fluffy. Add egg, milk and vanilla; beat well. Stir together flour, baking soda and salt; gradually beat into mixture.

    3. Shape dough into 1-inch balls. Roll in sugar; place on ungreased cookie sheet.

    4. Bake 8 to 10 minutes or until lightly browned. Immediately press a chocolate heart into center of each cookie. Remove from cookie sheet to wire rack. Cool completely. ( put them in the freezer because the chocolate hearts continue to melt)

    Makes about 4 dozen cookies.

    {and when valentine's day is long over you can go back to using Hershey's kisses!}

    Monday, January 9, 2012

    What's in store for the 2012....New year?

    The many jars on my refrigerator shelf...

    It's a new year, fresh and full of potential. I am pretty much finished with my kitchen remodel; there is painting to do and a little electrical but the kitchen is ready for a busy 2012 year.  The beginning of the year  is the perfect time to take stock and consider what changes you want for your kitchen. Do you have have some new cooking goals? Do you have a drawer full of recipes you want to try? Did you receive a new appliance or cookbook over the holidays that is inspiring you? What changes or new things do you want to see in your kitchen this year? I think any time of the year is a good time to redo or make changes but when the year is fresh, it can sometimes inspire us to start fresh. I am not talking about a New Year's resolution kind of a way, which I believe makes us feel a lot of guilt...I'm thinking more along the lines of  learning an unknown skill or cuisine. Perhaps you might want to take a cooking class, maybe start a garden and use what you grow. Will that new mixer inspire a year of cake baking or bread making? Do you want to have and host more dinner parties? Buy less processed food? Eat out less and learn to make more home cooked meals? What ever it is I encourage you to give it a try!!!

    As for me, I want to continue my canning. I would like to try and invent more canning recipes; as well as create everyday recipes by incorporating the finished product. I love looking in my refrigerator and seeing that I have learned to make a lot of the food we eat. I want to make more condiments. I would like to create some mouth watering sandwiches for the summer months. I enjoy the holidays so I am looking for more ideas around food to add to our family traditions. I would like to learn some other ways of using the vegetables we grow in our garden. Making my own bread and pasta is a goal this year. I am looking for a great  hamburger and hog bun to master. I am also interested using more of what we (my Gardner Guy and I) can produce ourselves, depending less on products from the grocery store. I do like trying new products; I will continue to experiment and create and learn better kitchen skills....better ways of organization, better eating habits that I can share with my family, my many friends, neighbors and followers...

    I FOUND A GREAT WEBSITE....AND I WANT TO SHARE IT!!!

     Here are five cooking skills that might be on your list — along with the tutorials and recipes to get you started.

    Start canning: It's never too late to master the art of putting up preserves, pickles and produce to enjoy throughout the year.
    http://www.thekitchn.com/canning-basics-tutorials-recip-140097

    Improve your knife skills: Better knife skills mean faster, safer cooking. These ten tutorials cover the basics. Don't forget to use a sharp knive.
    http://www.thekitchn.com/how-to-cut-up-a-chicken-10-kni-138335

    Make bread from scratch (even on a busy weeknight): From 15-minute biscuits to no-knead bread started the night before, there is a homemade bread to fit every schedule.
    http://www.thekitchn.com/time-to-bake-fr-162820

    Stock up on homemade condiments: From-scratch mayonnaise, mustard, ketchup and hot sauce are simple to make and taste much better than their store-bought counterparts.
    http://www.thekitchn.com/what-the-new-york-times-says-y-157413

    Play around with fermentation: There is magic in the way fermentation transforms milk to yogurt, cabbage to kimchi. Why not give it a try this year?
    http://www.thekitchn.com/pickles-preserves-brews-9-diy-157299

    Enjoy,
    Georgie

    Wednesday, January 4, 2012

    Apricot Frozen Yogurt


    Homemade Apricot Frozen Yogurt
    1 cup nonfat vanilla yogurt, strained
    1 cup apricot puree
    1 tablespoons granulated sugar, or sweet apricot jam works
    (At times I have use other sweetners,  example would be a simple sugar syrup mixture)

    Mix everything together in a large mixing bowl until completely combined. Churn the mixture in an ice cream maker for a few minutes until it is a smooth, cool consistency. Alternatively, place the bowl in the freezer and stir mixture every half hour until it reaches desired consistency.

    Salted Caramel Sauce, with printable label's....


     This sauce recipe is great with fruit, over ice cream, cheese cake, in a (milk shake) and it makes a super gift.
                 
    SALTED CARAMEL MILKSHAKE:
    • 1/4 cup salted caramel sauce

    Yield: 4 jars of sauce

    Prep Time: 20 min + cooling time

    Cook Time: 12 min


    Ingredients:

    1 1/2 cups granulated white sugar
    1/2 cup water
    1 cup whipping cream
    1 1/2 tablespoons salted butter
    1 teaspoon vanilla extract
    1/2 teaspoon sea salt
    Four 4-ounce jelly jars with lids, cleaned and dried

    Directions:

    1. Combine sugar and water in a medium saucepan over medium-high heat. Stir. Bring the mixture to a boil and shake/swirl the pan very often (don't stir it while it's boiling) until it turns a medium amber color (should take 12 to 15 minutes). If sugar crystals gather along the sides of the pan during the cooking process, you can use a pastry brush dipped in water to brush the sugar down the sides of the pan so that it becomes incorporated into the boiling mixture.

    2. Remove the pan from heat and pour in the cream. It will bubble up like crazy. Give it a whisk, then add in the butter, vanilla and sea salt. Whisk again until everything is nice and smooth. It should be the color of caramel. Cool it in the pan, or pour it into a large measuring cup so that it will be easier to transfer to jars when cooled. Now if your wanting to do a few jars for your pantry pour caramel sauce into warm jars and seal with new seals...best if used within 3 months. There is a lot of mixed information out on the internet and as of yet I have not gotta a clear answer on canning carmel sauce for extened shelf life.

    3. Divide the sauce evenly among the four jars. Place lids and labels on and refrigerate until ready to use or gift to friends.  If not canning this sauce the sauce must be kept refrigerated and it will stay fresh for 4 to 6 weeks.

    Tips:

    *Boil jelly jars and lids for a couple of minutes to really get rid of any grime that might be in there from packaging or storage. Then let them dry thoroughly before adding the sauce.

    *If your sauce solidifies, you either let it cook too long or the heat wasn't high enough. Pull it off the heat when it is a nice, medium amber color. It's important that it maintains a nice boil at medium-high heat and that you don't take yours eyes off of it. Keep swirling the pan and don't let it burn!

    *Serving suggestions: Serve with apples, cheesecake, ice cream, or incorporate it into a milkshake!
    Source: RecipeGirl.com (Adapted from Food Network Magazine)


    Click on these links for printable label's ...great gift idea!!!


    Georgie

    Monday, January 2, 2012

    World's Biggest Pumpkin Exhibition...this would be fun to do with my Gardner Guy!!!


    I have had lots of visitors while recovering from my surgery. I have not done much cooking but have been compiling a list of thoughts of things I want to do this year. I have lots of pumpkin puree in the freezer, which reminds me I did not do a post on making your own pumpkin pies from pumpkins. No worries because I believe pumpkin goodies can be eaten all year long!!! While playing on my computer I came across something I would LOVE TO SEE!!!

    The Ludwigsburg pumpkin festival in Germany... Each year there is a different theme using over 500,000 pumpkins,  and over 450 varieties...I would really love to see this. Computers are great, the Internet allows us to visit places we may never get to. However in my wish bucket this would be worth seeing to me...


    Did you know?

    Quebec farmer Jim Bryson and his daughter Kelsey have grown the world's largest pumpkin. The massive vegetable weighs in at an impressive 1,818.5 lbs (or 825 kg).
    Bryson - an Ormstown native - began growing large vegetables four years ago after learning about the sport from his cousin. His first pumpkin project was a success, reaching 600 lbs (272 kg). “After that, I was hooked,” he says.
    Cultivating a massive winter squash is no small task. During peak growing season, Bryson can spend up to 10 hours a day tending to his garden. Special compost, heating cables and grow-lights contribute to the pain-staking process.
    On a good day a pumpkin can grow up to 50 lbs, or 23 kg, a feat that is best achieved under favourable weather conditions.
    “We live in a really good climate for growing vegetables,” Bryson says. “We don't get extreme heat or cold. We have pretty unique weather in this part of Quebec.”
    Bryson's pumpkin has been turned into a Hallowe'en sculpture by artist Ray Villafane. This pumpkin was on display at the New York Botanical Garden 2001 fall season. I like stories like this as it gets my mind thinking of all the possibilities!!! Just think of all the pumpkin treats one could make with such a huge pumpkin!!!

    Georgie

    Here are some great pumpkin treats to try....

     Homemade Pumpkin Yogurt
    http://www.blogger.com/post-edit.g?blogID=3456120515502881405&postID=2368475626433558755

    Easy Pumpkin Cookies
    http://mygardnerguy.blogspot.com/2012/01/easy-quick-pumpkin-cookies.html

    Mini Pumpkin Bundt Cakes
    http://www.blogger.com/blogger.g?blogID=3456120515502881405#editor/target=post;postID=6358033011481229671

    Roasted Pumpkin and Garlic Soup
    http://www.blogger.com/blogger.g?blogID=3456120515502881405#editor/target=post;postID=2350856946239702021

    Pumpkin Seeds you'll love them....http://mygardnerguy.blogspot.com/2012/01/pumpkin-seeds-roasted-and-caramelized.html

    MINI PUMPKIN BUNDT CAKE WITH CARAMEL SAUCE!!!

    1 cup sugar
    1 cup brown sugar
    1 cup vegetable oil
    3 eggs
    3 cups flour
    2 tsp. baking soda
    1 tsp. cinnamon
    1 tsp. nutmeg
    1/2 tsp. salt
    5.1 oz box of instant vanilla pudding mix
    15 oz. pumpkin puree

    Preheat oven to 350 degrees.

    Beat sugar, brown sugar, and oil together in large bowl. Add eggs, mixing well after each addition.

    In a separate bowl mix all dry ingredients: flour, baking soda, cinnamon, nutmeg, salt, pudding mix.

    Alternate adding pumpkin and dry ingredients to the sugar, oil, and egg mixture. Mix well.

    Fill greased mini bundt pans (I always use baking spray that contains flour) 2/3 full with batter. The cakes will rise a lot while baking.

    Bake for 15-18 minutes, but do not over bake! The cakes will start pulling away from the edges of the pan when they are done and inserted toothpick will come out clean.

    Allow to cool so that you can use your hands to remove them from the pan and place on a cooling rack to finish cooling.

    Now for the topping......


    Salted Caramel Sauce

    Just about any carmel sauce would work but isn't it cool to have some already in the pantry you can use. This sauce recipe is great with fruit, over ice cream, cheese cake and it makes a super gift.

    Yield: 4 jars of sauce

    Prep Time: 20 min + cooling time

    Cook Time: 12 min


    Ingredients:

    1 1/2 cups granulated white sugar
    1/2 cup water
    1 cup whipping cream
    1 1/2 tablespoons salted butter
    1 teaspoon vanilla extract
    1/2 teaspoon sea salt
    Four 4-ounce jelly jars with lids, cleaned and dried

    Directions:

    1. Combine sugar and water in a medium saucepan over medium-high heat. Stir. Bring the mixture to a boil and shake/swirl the pan very often (don't stir it while it's boiling) until it turns a medium amber color (should take 12 to 15 minutes). If sugar crystals gather along the sides of the pan during the cooking process, you can use a pastry brush dipped in water to brush the sugar down the sides of the pan so that it becomes incorporated into the boiling mixture.

    2. Remove the pan from heat and pour in the cream. It will bubble up like crazy. Give it a whisk, then add in the butter, vanilla and sea salt. Whisk again until everything is nice and smooth. It should be the color of caramel. Cool it in the pan, or pour it into a large measuring cup so that it will be easier to transfer to jars when cooled. Now if your wanting to do a few jars for your pantry pour caramel sauce into warm jars and seal with new seals...best if used within 3 months. There is a lot of mixed information out on the internet and as of yet I have not gotta a clear answer on canning carmel sauce for extened shelf life.

    3. Divide the sauce evenly among the four jars. Place lids and labels on and refrigerate until ready to use or gift to friends.  If not canning this sauce the sauce must be kept refrigerated and it will stay fresh for 4 to 6 weeks.
    Tips:
    *Boil jelly jars and lids for a couple of minutes to really get rid of any grime that might be in there from packaging or storage. Then let them dry thoroughly before adding the sauce.

    *If your sauce solidifies, you either let it cook too long or the heat wasn't high enough. Pull it off the heat when it is a nice, medium amber color. It's important that it maintains a nice boil at medium-high heat and that you don't take yours eyes off of it. Keep swirling the pan and don't let it burn!

    *Serving suggestions: Serve with apples, cheesecake, ice cream, or incorporate it into a milkshake!
    Source: RecipeGirl


    Click on these links for printable label's ...great gift idea!!!


    Georgie

    Sunday, January 1, 2012

    Pumpkin Seeds roasted and a caramelized version...


    This is my cute toothless Avery Mae....

    What to do with all those pumpkin seeds.....wash them, drain and let dry....then
    Drizzle with a little olive oil and sprinkle with salt.
    Dump the seeds onto your cookie sheet, spread into a single layer, and place in the oven with your pumpkin halves. Bake for about 15 minutes, then using a spatula mix them around and spread them out again. Bake for another 15 minutes.
    Remove from oven and let cool, then eat! I season mind just with a little salt and pepper plant seasoning, but you can season with lots of different spices...
    Sea Salt
    Kosher Salt
    and/or
    Red Chile Powder
    Cayenne Chile Powder
    Ancho Chile Powder
    Fresh Cracked Black Pepper
    Careful! These are amazingly addictive! Our little Avery Mae loved them!!!

    Caramelized Pumpkin Seed Recipe....(recipe below)


    Prep Time:Cooking Time: 5 mins  8 to 10 mins
    Ingredients:
    1 1/2 to 2 cups fresh pumpkin seeds (cleaned and patted dry)
    2 to 3 tablespoons brown sugar
    pinch of kosher salt
    olive oil cooking spray
    Place pumpkin seeds in a dry non-stick frying pan over medium heat. Toast them in the pan, constantly shifting them around so that they roast evenly and don’t stick to the pan. When they start to pop and peel, take one out and taste it (make sure it’s cool enough first). If it’s crunchy it’s done. Turn the heat down to low and spray the seeds with olive oil cooking spray and then spoon sugar into pan and stir seeds up as sugar melts and sticks to the seeds. Turn heat off and sprinkle with salt. Let cool and serve!

    Georgie
    

    Easy quick pumpkin cookies!!!

    These are the simplest pumpkin cookies to make.

    And I'm all about simplicity right now.

    Pumpkin Chocolate Chip Cookies
    1 box Spice Cake Mix
    1 (14 oz) can pumpkin puree... Or if you made your own like I did with all those Halloween pumpkins use it!!!
    1 bag (2 cups)  chocolate chips (or the desire amount you think you would like) 
    Combine cake mix and pumpkin puree. Stir in chocolate chips. Drop by rounded spoonfuls onto a greased cookie sheet. Bake in a preheated 350 degree oven for 12-15 minutes.

    Georgie

    ROASTED PUMPKIN AND GARLIC SOUP


    2 pounds peeled pumpkin, cut into large chunks
    1 bulb garlic
    3 tablespoons olive oil, divided
    1 large onion, diced
    Leaves from 2 or 3 sprigs of thyme
    Leaves from 1 large sprig of rosemary
    1 or 2 sage leaves, diced
    2 tablespoons minced parsley
    3 cups vegetable stock
    2 tablespoons sour cream
    1 teaspoon cayenne pepper sauce
    Salt and pepper to taste
    Preheat oven to 375 degrees.
    Toss pumpkin in 1 tablespoon of oil and spread on a baking sheet in a single layer. Cut top off of garlic bulb, place bulb in center of a square of aluminum foil and drizzle with a little olive oil. Wrap bulb up, sealing completely. Place wrapped bulb on baking sheet. Bake the pumpkin and garlic for one hour. Remove and let cool. Remove skin from pumpkin pieces.
    Saute the onion in a stockpot in remaining oil until translucent. Add in herbs and cook another minute. Add in broth and roasted pumpkin. Squeeze the garlic cloves out of the cooked bulb and add to pot. Simmer for 20 minutes or so, until slightly reduced.
    Blend with a stick blender or in batches in a blender. Add sour cream, cayenne pepper and salt and pepper to taste. Optional garnishes: nutmeg, paprika, sour cream swirl, croutons,  and bacon...

    Georgie

    Loving mashed potatoes the Irish Way!!!

    You can use kale instead of cabbage, but I personally prefer the softer and sweeter taste of cabbage. Colcannon is traditionally topped with...